ayoooo updating my website ate all the photos I had previously posted to it, so I’m making a new tutorial based on my Improved binding for chunky zines post! I’ve actually updated my technique a little while since making that post anyway.
psssst you can get one of these copies here or request a free solidarity copy by emailing mildewamyx(at)protonmail(dot)com
What it is:
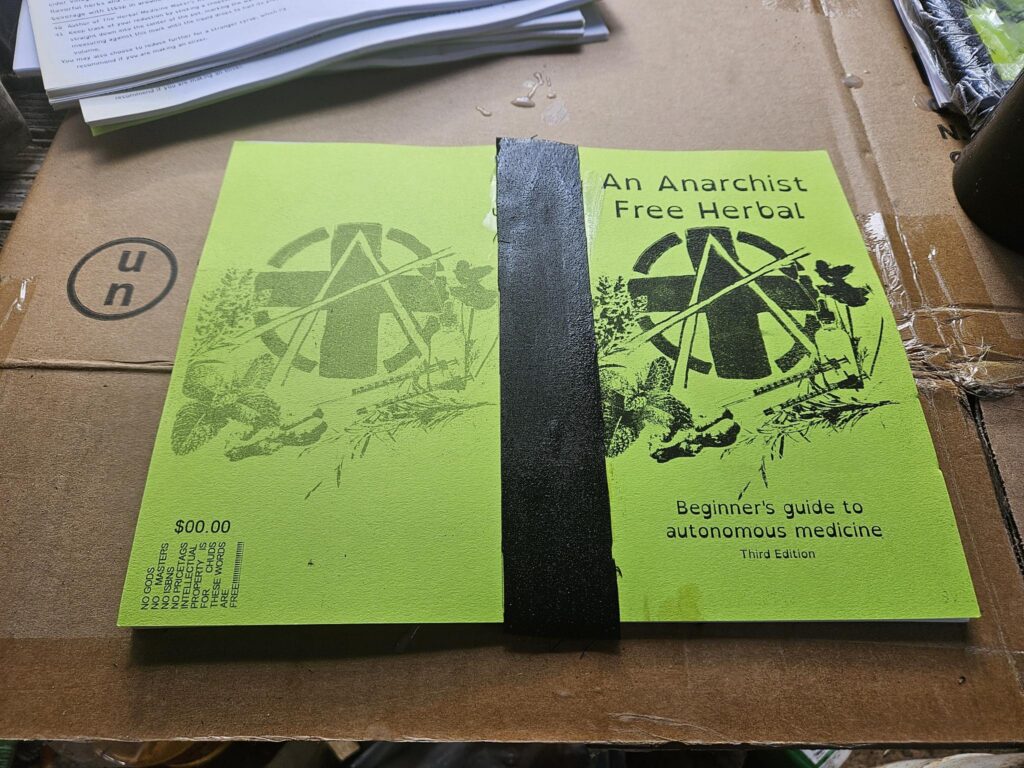
This is a fabric-reinforced stapled binding for folded zines and books. It uses a thin glue to securely attach a fabric strip to a card stock cover. This helps keep your cover/outside pages from ripping off the spine, and also introduces moisture that (in combination with a strong weight or press) actually molds the paper into a tight u-shape. This means the finished zines sit flat, rather than flopping around, wiggling and quickly falling apart like they might if they were folded and stapled conventionally.
When it’s useful:
This technique is perfect for very long zines and short books that are too thick to staple normally (we’ll actually be using a utility stapler/staple gun, rather than an office stapler)–it lets small creators work on big projects without needing to invest in expensive equipment. The only tool you might need to buy is a staple gun–and that’s like, fifteen bucks and generally a good thing to have if you don’t got one already. It’s also better than spiral binding for shipping–you don’t need to worry about the spirals getting crushed or poking through your packaging, and if your piece is like 30-ish sheets (120 pages) or less, it’ll still be under 1/4″ thickness and you can still pay USPS letter rates if it’s under 6″x9″ (nice) (which should be around $2.35, instead of media mail which is fucking FOUR BUCKS A POUND now). It’s also cuter than regular staples and a good way to add a polished touch to a smaller piece even if it COULD be stapled normally, and I think it would be fantastic for something like a pocket guide format–a nice, thick 5.5″x4.25″ (quarter sheet) book instead of a larger, floppier 5.5″x8.5″ half sheet zine.
I haven’t met a maximum sheet count for this technique yet, but it starts getting a little bit harder around 40 sheets (160 pages). There’s no minimum, but if your piece is under 15 sheets, you can skip the staple gun and just use a long-arm stapler.
Limiting factors:
But wait, what are the downsides? Well–
- It takes a bit of time and effort. I don’t think it’s that bad–definitely easier than hand-saddle-stitching or god forbid a hand-bound codex on every. single. copy, and less room for error than trying to glue bind a bunch by hand–but it will take you a few hours to get a batch done.
- Batch size is limited by whatever you have to press them with AND your willingness to sit and do papercrafts for an extended period. The latter can be remedied by conviction (or haranguing your friends into helping–it is fun!) but the former really depends on how many huge, flat, very heavy objects (think milkcrate full of canned goods more than a couple hard-cover books) or, if you’re fancy, clamp-and-board sets you have. You may ONLY stack FOUR BOOKS TO A LAYER under whatever you’re pressing them with.
If those sound like reasonable constraints you can deal with in your project, great! lets go.
What you’ll need

- A utility stapler (staple gun) with 1/2″ staples (smaller will probably work if your zine isnt HUGE, but if you’re buying something for bookbinding generally you’ll want nice long ones to make sure you can bind anything that comes your way)
- Some kind of soft surface to staple through your pages into, so that you’re not just attaching your books to whatever your work surface is and having to wrench them out. I’m using a bit of foam packing material which works great; you could use anything similar, Styrofoam, whatever, even a couch cushion if you don’t care about putting a ton of holes into it.
- Any kind of small piece of wood to bend your staples with. I’m using a random scrap block; you could use anything like that or even the handle of a wooden spoon or spatula.
- Plastic wrap cut into sheets that are roughly 8″ by however wide your roll is. You can reuse these for the next batch.
- Pre-cut fabric strips. See deets below.
- Some glue. Wheatpaste recipe below; or use white glue diluted 1:1. We want it to be thin and runny
- Something to press your books-in-progress with at least overnight–as said above, it needs to be very heavy and flat, like a crate of canned goods, a cinder block, a LOT of books…you can also use boards and clamps, i’ll be using some random scrap plywood boards cut about 7″x9″ and my tincture press. As above, FOUR COPIES TO A LAYER–I’m doing a twelve copy batch today so I have four boards (you’ll see what i mean).
- Some cardboard or some shit to cover your work surface and soak up extra glue
- A towel to wipe glue off your hands on, or wear pants you don’t care about
- Some smallish sharpish scissors
- And, of course: Your unfolded printed pages with a cardstock cover for each.
WAIT! BEFORE YOU PRINT YOUR COVERS:
Add a line to your cover art down the very center of the spine. This is where you’ll put your staples. Add too more lines on either side of that one, the width of your fabric strips. This will make your life so much easier I promise. Honestly? If you already have printed covers, take a bit of time to measure and draw these lines out on them, it WILL pay off in how consistent your copies are and how nice they look and it’s faster than trying to fuck with drawing lines or making guides in the middle of the process.
FABRIC
You can use ANY woven, non-stretchy fabric that isn’t too think (probably denim wouldn’t work but thinner than that’s fine). If you’re buying fabric for a specific color, I recommend getting cheap poly-cotton broadcloth; otherwise poke around for old bed sheets or clothes to cut up. Your strips need to be at least 1/4″ longer than your spines–you can absolutely eyeball this as LONG AS THEY ARE LONGER. We’ll trim them down as the last step but if you try to make them exactly the right length from get they will be too short at the end. I don’t make the rules. As for width, up to you, but no thinner than an inch and a half. Take care to cut the sides of your strips neatly unless you’re going for a trashy look.
WHEATPASTE
Want to spend Almost Zero Money on your glue? Great. Here’s what you’ll need for a wheatpaste that’s the right consistency:
- 1/4 cup flour
- 1 cup water
- 1/2 cup white vinegar
- A fork or a whisk or something like that
- Small saucepan + stove
- A sealable container for your wheatpaste
PLEASE NOTE that because this is acidic, it is NOT archival quality glue. It might discolor some colored coverstock and paper, and your books will likely not live to be fifty, let alone 1,000 years old. It IS cheap though and it works great, and unlike other wheatpaste recipes this one’s actually pretty shelf stable. I wouldn’t, like, eat it after 24 hours, but I wouldn’t eat it anyway so.
Whisk your water and flour together in a small saucepan until there’s NO CLUMPS, and then put it on medium low heat. Bring the mixture up to a low simmer and stir frequently, scraping any thicker mix off the edges and bottom of the pan and mixing it back in. Once the mixture is about the consistency of raw egg, turn the heat off and continue stirring. As it cools it should thicken up to about a soft-set pudding texture. Add your half cup of vinegar and stir in thoroughly, and then pour into a jar or a tupperware or something for storage. Done!
This recipe makes enough for somewhere in the neighborhood of fifty books.
hint! You can put anything you want in your glue. Glitter? Check. Confetti? Sure. Pigment or paint? Why not! Glow in the dark paint? hell yeah bud! Just remember that if you add anything, it won’t dry clear anymore, so you’ll have to be a lot neater during the glueing process if you don’t want it to look messy.
Okay that’s enough let’s get started for real actually
Do each step for every copy in your batch before moving on to the next step.
I recommend starting with a trial run of no more than eight copies, four if you don’t do many crafts. Don’t bite off more than you can chew and only realize it when everything’s already soggy!
Step one:

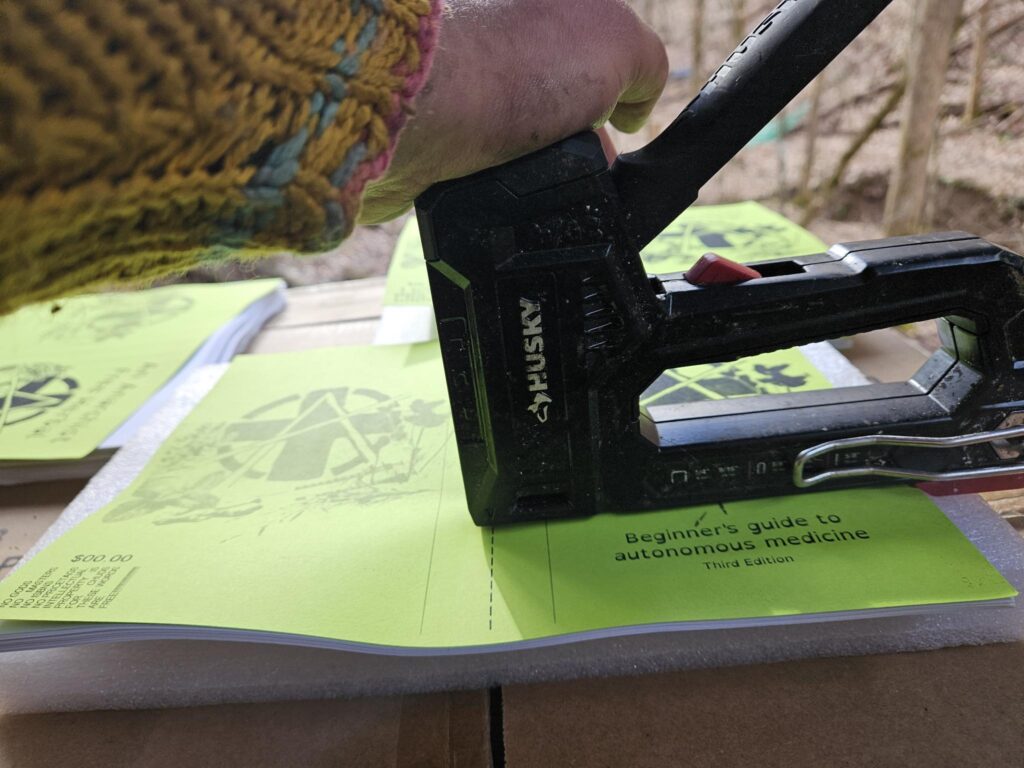

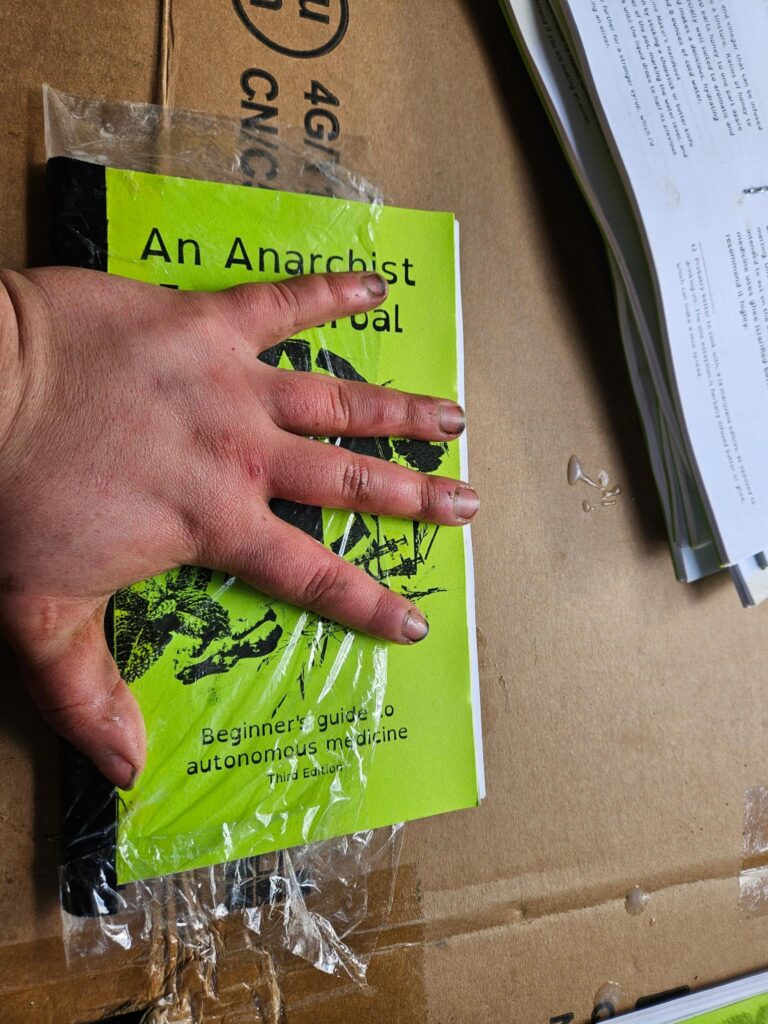
Using your SOFT SURFACE (so you’re not wrenching your pages out of whatever you just stapled them to and potentially damaging them), make sure your pages are in a neat stack, line up your staple gun with that center line, and let em loose!
Make sure to use TWO HANDS! Use the heel of your non-dominant hand to press down on the top of the staple gun right above where the staples come out, as shown in the picture above. Otherwise, the stapler will kick back and your staple won’t sink all the way into the pages to sit flush with the cover.
Placing your staples as close to exactly on the center line of your cover is important (your staple gun SHOULD have an arrow you can use to line it up); but their vertical placement on that line does not really matter–the staples won’t be visible from the outside, so just eyeball two staples that seem like a reasonable distance from eachother and the top and bottom edges of the book and don’t waste time fussing over it.
Step two: Bend in those staples
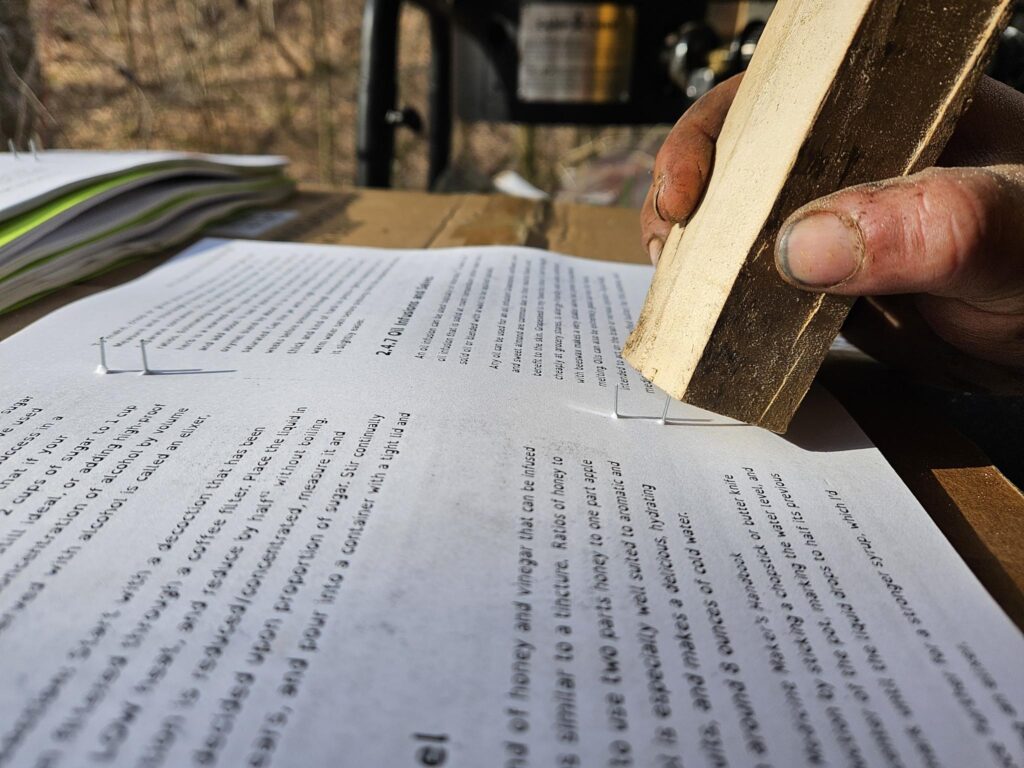
On a HARD SURFACE (so it, uh, works), use the edge of that block of wood to bend in them staple ends! It actually is easier to understand in video, so here:
step three: glue, fold, crush
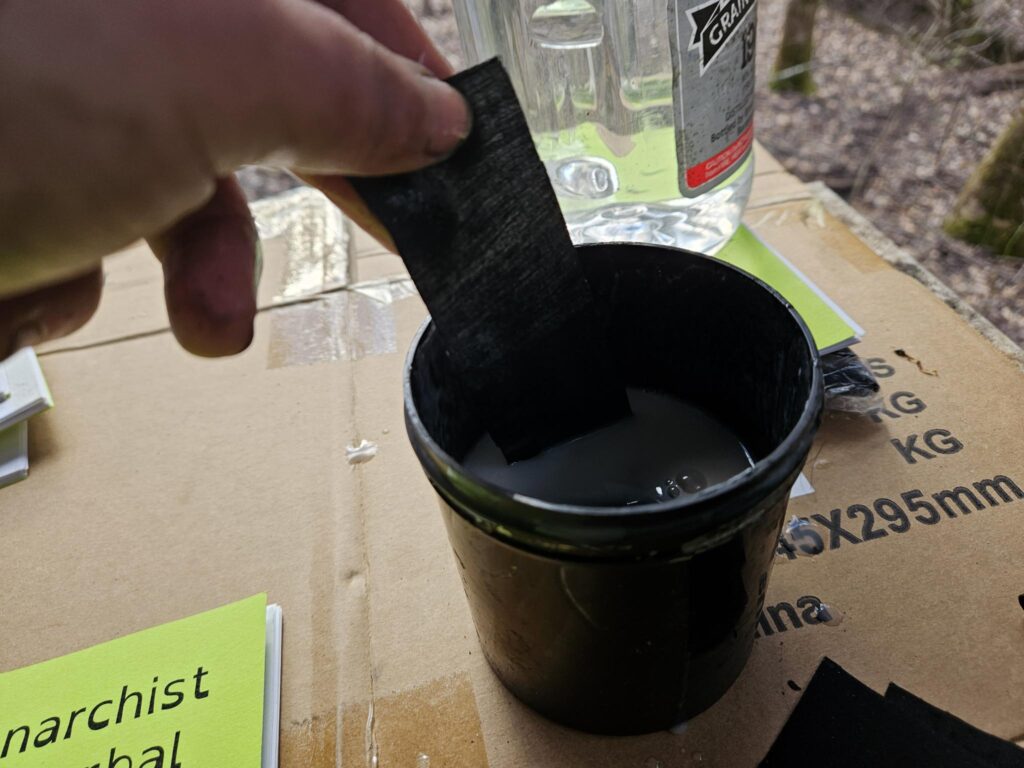
Dip a fabric strip into the glue and then squeegee off the excess with your fingers. Genuinely I think this is easier, faster and tidier than using a brush or a sponge or something, which i’ve done in the past. You want the strip totally saturated. Line it up with both of your outer lines on the cover and smooth down with your fingers. Give your hands a quick wipe on your pants or an ergonomically placed towel.
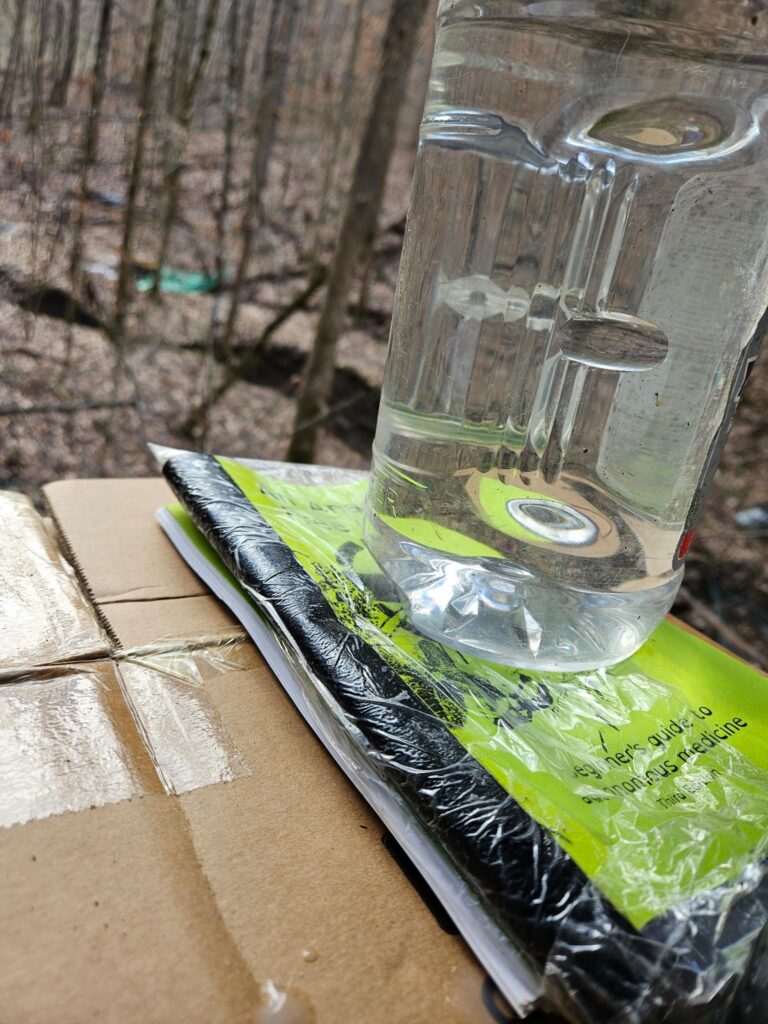
Slap a piece of plastic wrap over that spine while it’s still flat, pick it up and fold it in half. Press down slowly and then hold with pressure over as much as the spine as you can (ideally with both hands, i was taking a picture so I just had the one spare) for about thirty seconds.
Stack your folded copies (spines facing alternate directions) under a temporary weight (here, a handle of grain alcohol). When you have FOUR, NO MORE! copies stacked:
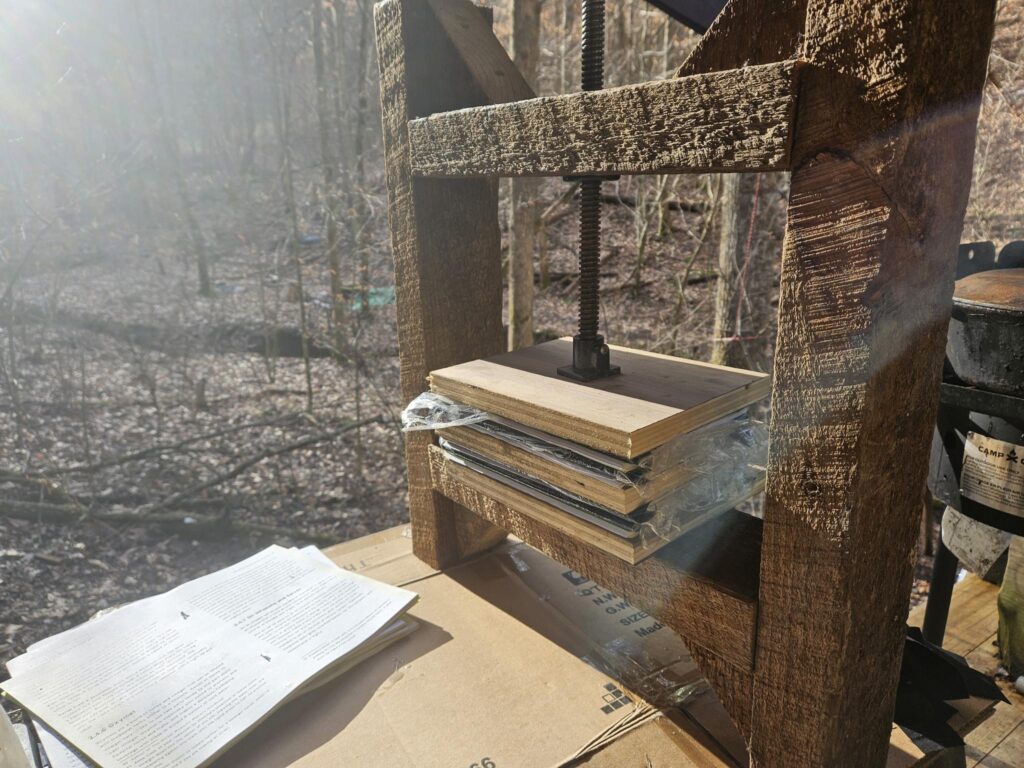
Place your stacks of four at a time into or under whatever apparatus you’re using to crush them–pictured I have two layers of four, so eight copies total, with the remaining four next to them.
Let your copies dry under weight overnight. It’s okay if they’re still a little damp, but they shouldn’t be wet or sticky for the next step.
Step four: trim!

use a small pair of scissors to snip the spine strips so they’re all even with the top and bottom of the book, and there you go! Congrats.
Published by